Have you ever experienced a jumpy or jerky ride while driving your car? Do you feel like your vehicle struggles to change gears or fails to respond as it should? These symptoms might indicate a common problem called transmission slipping.
These are the likeliest causes of why your transmissions slips before warming up:
- Low transmission fluid
- Worn out transmission bands
- Faulty transmission solenoids
- Worn clutch components
In this article, we’ll explore the causes behind transmission slipping when the vehicle is cold, how to diagnose the issue, and what fixes are available to get you back on the road safely.
What Temperature Does the Transmission Need to Be?
The optimal transmission temperature varies depending on the vehicle and its specific transmission system. Generally, the ideal temperature range for most automatic transmissions is between 170°F (77°C) and 225°F (107°C). When the transmission fluid is within this range, it provides optimal lubrication, reduces wear on internal components, and helps prevent overheating.
Causes of Transmission Slipping
Transmission slipping can be caused by various factors that can affect the performance of the transmission system. Understanding the causes of transmission slipping can help you take appropriate steps to prevent or repair the issue.
1. Low transmission fluid
Transmission fluid helps the gears in a car change smoothly. If there isn’t enough fluid, the gears won’t have enough lubrication. This can cause them to slip or not change properly. Low fluid can also lead to overheating, which makes it harder for the transmission to work well.
2. Worn-out transmission bands
Transmission bands help hold the gears in place when they’re not being used. If these bands are worn out, they can’t do their job. This means the gears might not stay in place, causing the transmission to slip as the car changes gears.
3. Faulty transmission solenoids
Transmission solenoids are small electrical components that control the flow of transmission fluid within the transmission system.
If the solenoids become faulty or malfunction, they can cause a disruption in the flow of fluid, leading to slipping or hesitating gears. In some cases, the transmission may not shift at all. This can result in reduced power, poor acceleration, and other performance issues.
4. Worn clutch components
Manual transmission systems use a clutch to connect and disconnect the engine’s power to the transmission. The clutch consists of several components that can wear out over time due to normal use or lack of maintenance. When their components become worn out, the clutch can slip or cause hesitation during acceleration, leading to reduced power and performance issues.
How to Diagnose Transmission Slipping
Here, I’ll briefly explain how you can diagnose transmission slipping.
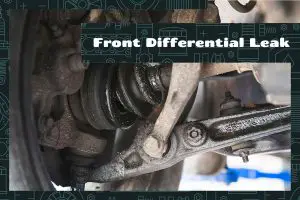
1. Check for leaks

Looking for leaks is a way to diagnose transmission slipping. Leaks can cause low transmission fluid, which makes it hard for the gears to change smoothly. Check under the car for puddles or stains from fluid. You can also look at the transmission itself for wet spots or fluid dripping.
2. Monitor transmission fluid temperature
Keeping an eye on transmission fluid temperature can help diagnose slipping. When the fluid gets too hot, it can cause the gears to slip. Use a transmission temperature gauge or the car’s dashboard display to check the temperature. If it’s higher than normal, it might be a sign that the transmission is slipping due to overheating.
3. Inspect clutch components
Examining the clutch components can help you find out if they’re causing transmission slipping. If the clutch is worn or damaged, it might not connect the engine and transmission properly. Look at the clutch pedal, the clutch disc, and other parts for signs of wear or damage.
Fixes for Transmission Slipping
Now that we know what the causes are take a look at the following sections to figure out how to resolve transmission slipping problems.
1. Refill or replace transmission fluid
- Park your car on a level surface and turn off the engine. Wait for the engine to cool down.
- Locate the transmission dipstick, usually near the engine. Check your owner’s manual if you’re unsure where to find it.
- Pull out the dipstick, wipe it clean with a cloth, and reinsert it fully.
- Remove the dipstick again and check the fluid level. If it’s low, you need to add more fluid.
- Locate the transmission fluid fill port, which is usually close to the dipstick.
- Use a funnel to pour the correct type of transmission fluid into the fill port. Add a small amount at a time, checking the dipstick level to avoid overfilling.
If the fluid is dirty or burnt, consider draining and replacing it completely. This usually requires a professional mechanic.
2. Adjust or replace transmission bands

- Locate the adjustment screw and locknut on the transmission bands, as specified in the service manual.
- Loosen the locknut with a wrench, then tighten the adjustment screw until snug.
- Back off the adjustment screw with the recommended number of turns, as stated in the service manual.
- Hold the adjustment screw in place and tighten the locknut securely.
- If the bands are worn out, they may need to be replaced by a professional mechanic.
3. Repair or replace solenoids
- Disconnect the car battery to prevent electrical accidents.
- Consult your owner’s manual or a service manual to locate the transmission solenoids.
- Remove any components blocking access to the solenoids, following the manual’s instructions.
- Disconnect the electrical connectors from the solenoids.
- Unscrew and remove the faulty solenoids.
- Install the new solenoids and reattach the electrical connectors.
- Replace any removed components and reconnect the car battery.
- Test drive the car to ensure proper gear shifting.
4. Replace worn clutch components
- Park the car on a level surface and engage the parking brake.
- Disconnect the car battery to prevent electrical accidents.
- Raise the car using a jack and secure it with jack stands.
- Remove the wheels and any other components necessary to access the clutch assembly.
- Disconnect the clutch cable or hydraulic line, depending on your vehicle’s setup.
- Support the engine with a jack or engine hoist, then remove the transmission.
- Replace worn clutch components, such as the clutch disc, pressure plate, and throw-out bearing, following the service manual’s instructions.
- Reinstall the transmission and connect the clutch cable or hydraulic line.
- Replace any removed components, lower the car, and reconnect the car battery.
- Test drive the car to ensure proper gear shifting and clutch engagement.
FAQs
1. How long does it usually take for the transmission to warm up and stop slipping?
The time it takes for transmission to warm up and stop slipping can vary depending on factors like outdoor temperature and driving conditions. Typically, it takes around 5-10 minutes of driving for the transmission to reach its normal operating temperature and stop slipping if the issue is temperature-related.
2. Is it safe to drive my car when the transmission is slipping until it warms up?
Driving with a slipping transmission can be risky, even if it’s only until it warms up. Slipping can cause erratic shifts, reduced power, and increased wear on transmission components. It’s best to address the problem promptly to prevent further damage and ensure safe driving.
3. Are there any warning signs that my transmission may be slipping until it warms up?
Warning signs that your transmission may be slipping until it warms up include difficulty shifting gears, sudden surges in power, high engine RPMs without an increase in speed, and a delay in acceleration. You may also notice a burning smell or hear unusual noises while driving.