Your car’s engine operates under a wide range of temperatures, making heat management an integral part of its efficient functioning. In the middle of this thermal regulation system is a seemingly insignificant component known as the coolant temperature sensor.
Yet, this tiny device plays a colossal role in maintaining optimal engine performance, fuel efficiency, and emission control. When working properly, it ensures your car runs smoothly, but if faulty, it can lead to a host of problems.
The most common symptoms associated with a faulty coolant temperature sensor include:
- Inconsistent temperature readings
- Engine overheating
- Poor fuel economy
- Erratic cooling fan operation
- Difficulty starting the engine
In today’s guide, we’ll discuss the intricacies of the coolant temperature sensor, including its functionality, the symptoms of a faulty sensor, and how to replace one if necessary.
Basics of a Coolant Temperature Sensor
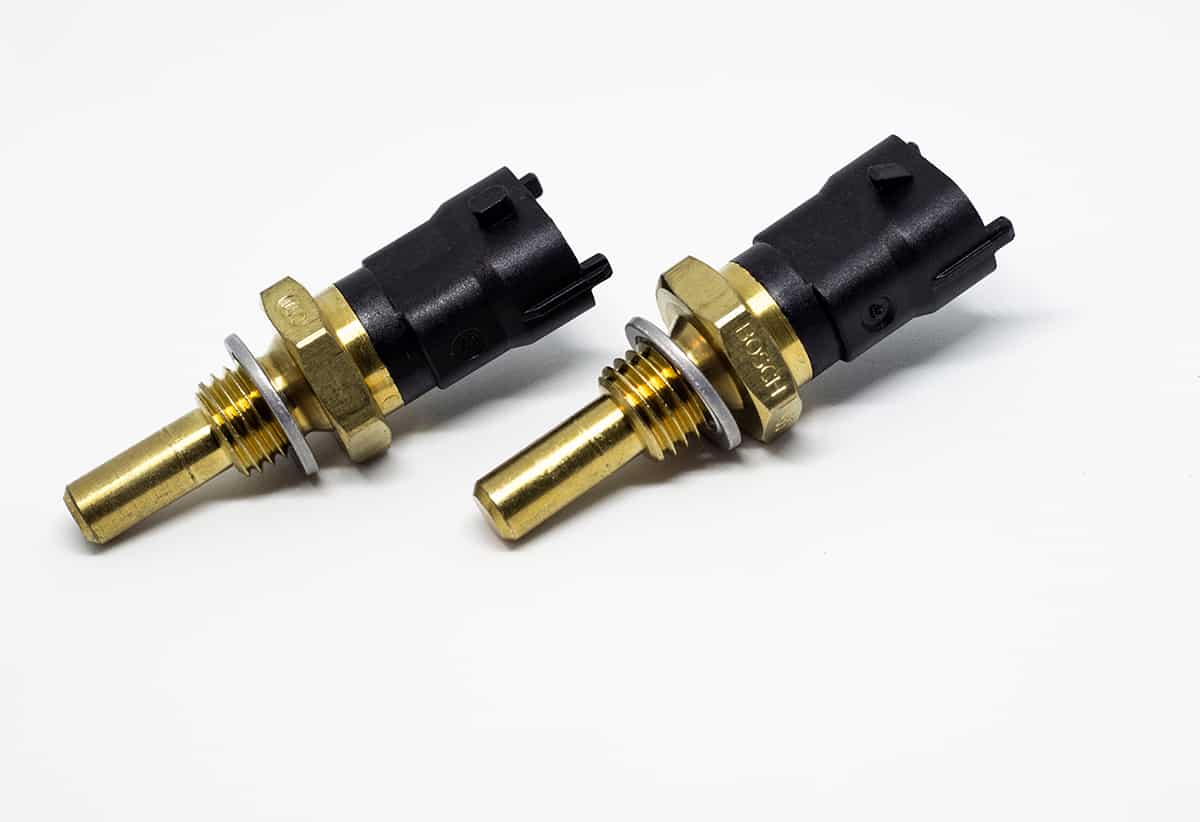
The coolant temperature sensor, also known as the engine coolant temperature (ECT) sensor, is a small but critical component in your vehicle’s engine management system. It is responsible for monitoring the engine’s coolant temperature, and it sends this information to the Engine Control Unit (ECU).
The ECU uses this data to regulate fuel injection, ignition timing and control the cooling fans, ensuring optimal engine performance. Understanding how it works, its types and its role can help you detect problems early and maintain your vehicle’s health.
How the Coolant Temperature Sensor Works
The coolant temperature sensor operates on the principle of variable resistance. It is a thermistor, meaning its electrical resistance changes with the temperature. As the engine’s coolant temperature rises, the sensor’s resistance decreases, and vice versa.
The sensor is usually located near the thermostat housing for accurate readings. Once the engine starts, the sensor begins to monitor the temperature of the coolant circulating in the engine. As the temperature changes, the sensor modifies its resistance accordingly, which changes the voltage signal sent to the ECU. The ECU interprets this voltage signal as a specific temperature reading.
The Role of a Coolant Temperature Sensor in a Vehicle’s Engine Management System
The coolant temperature sensor’s primary role is to provide the ECU with real-time data on the engine’s coolant temperature. This data is vital for numerous vehicle operations.
- Fuel Injection: The ECU uses the coolant temperature data to calculate the correct air-fuel ratio needed for the engine. Cold engines require a richer mixture, meaning more fuel per unit of air, while warm engines need a leaner mixture.
- Ignition Timing: Timing refers to when the spark plug fires to ignite the fuel-air mixture in the engine cylinders. The ECU adjusts this timing based on the coolant temperature to ensure optimal engine performance and fuel efficiency.
- Cooling Fan Control: The ECU turns on the cooling fans when the coolant temperature reaches a specific point, typically around 200°F (93°C), and turns them off when the temperature decreases.
If the sensor fails or sends incorrect signals, it can cause the ECU to make incorrect adjustments, leading to several engine issues. These can range from inefficient fuel consumption and poor engine performance to engine damage in extreme cases.
Signs and Symptoms of a Faulty Coolant Temperature Sensor
The sensor, being a key communicator in the engine management system, can manifest its failure through various symptoms. Let’s delve into these indicators.
1. Irregular Temperature Readings
A properly functioning sensor should provide a gradual increase in temperature reading as the engine warms up. If the sensor is faulty, the temperature reading on your dashboard may fluctuate erratically, stay at one extreme, or even fail to rise above a cold reading even when the engine has been running for some time.
2. Frequent Engine Overheating
This is because the sensor could send incorrect temperature readings to the ECU, which would then fail to activate the cooling fans. The result is an overheating engine. Frequent overheating can damage the engine and lead to expensive repairs, so it’s essential to address this symptom promptly.
3. Poor Fuel Economy
If the sensor transmits a colder-than-actual reading to the ECU, the ECU will enrich the air-fuel mixture, assuming the engine is cold. This enriched mixture means more fuel consumption. Consequently, you might notice that you’re refueling more often than usual, indicating a potential problem with the coolant temperature sensor.
4. Unusual Cooling Fan Behavior
The cooling fans in your vehicle rely on data from the coolant temperature sensor to know when to start and stop. If the sensor is faulty and provides incorrect temperature readings, the cooling fans might behave unusually. They could start running as soon as you start the engine (when it’s still cold) or fail to run even when the engine is hot. Such anomalies point to a possible issue with the sensor.
5. Difficulty Starting Engine
If your coolant temperature sensor is faulty, you might experience difficulties starting your engine, especially when it’s cold. This is because the sensor might send an incorrect, warmer temperature reading to the ECU, which then delivers a leaner air-fuel mixture, not ideal for cold starts. As a result, the engine might take longer to start or fail to start until several attempts.
Guide on How to Replace a Coolant Temperature Sensor
If your coolant temperature sensor is faulty and confirmed by diagnostic tests, replacing it is the next logical step. Although the process may seem complicated, with the right tools and steps, it’s a task manageable by anyone with basic automotive knowledge.
Tools Required for Replacement
Before you start, ensure you have the necessary tools. These are:
- Socket set or wrench
- Screwdriver
- Replacement coolant temperature sensor
- Anti-seize compound
- New coolant in case of leaks
Safety Precautions During Replacement
Before starting the replacement process, follow these safety precautions:
- Ensure the engine is completely cool. Working on a hot engine increases the risk of burns.
- Disconnect the negative terminal of the battery. This prevents accidental short circuits.
- Use protective gloves and safety glasses. This protects your hands and eyes from coolant splashes.
Step-by-step Replacement Process
- Locate the Coolant Temperature Sensor: The sensor is usually located near the thermostat housing or in the intake manifold. Refer to your vehicle’s manual if you’re having difficulty locating it.
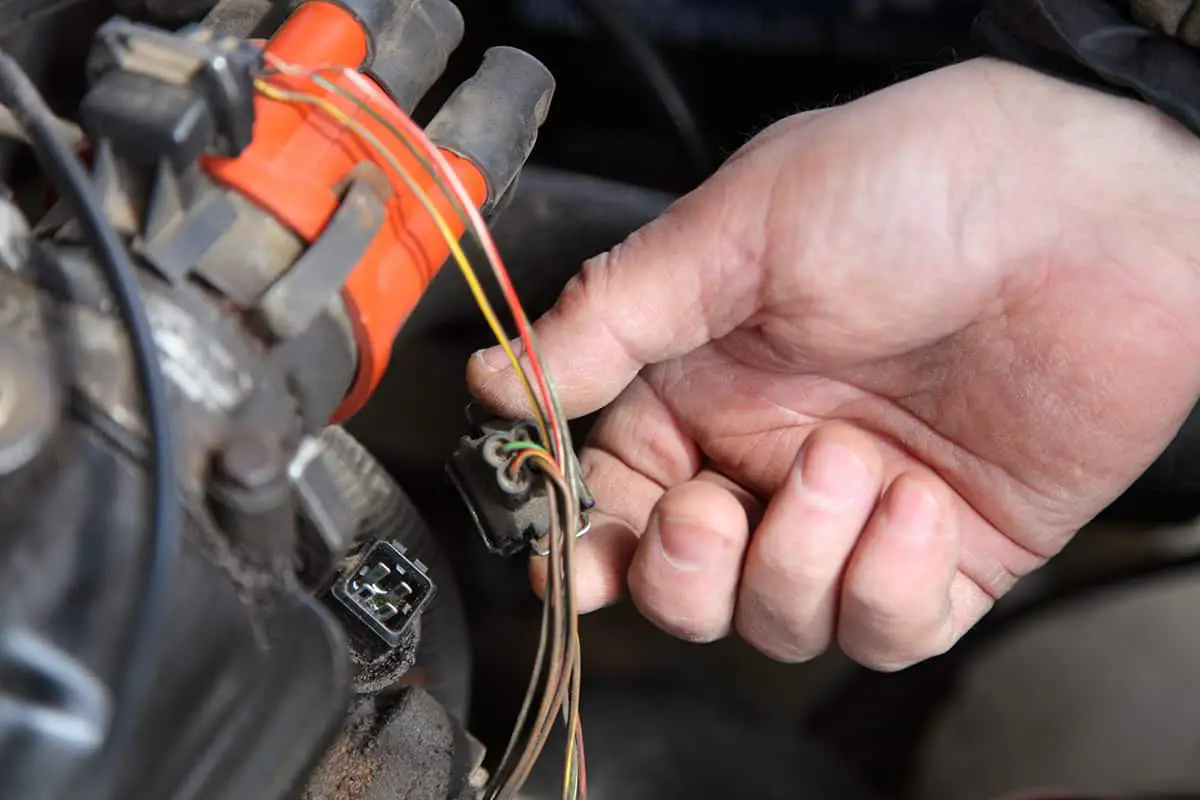
- Remove the Electrical Connector: Gently press down on the clip that holds the electrical connector in place, then pull it off the sensor. Be careful not to pull on the wires themselves as this could damage the connector.
- Remove the Old Sensor: Using the appropriate socket or wrench, carefully unscrew the old sensor. If the sensor is tight, try using penetrating oil to loosen it. Remember, coolant may leak out once the sensor is removed.
- Install the New Sensor: Apply a small amount of anti-seize compound to the threads of the new sensor. This will make future removal easier. Then, carefully screw in the new sensor by hand to avoid cross-threading. Once you can no longer tighten it by hand, use your socket or wrench to fully secure it. Avoid over-tightening as this could damage the sensor or its housing.
- Reconnect the Electrical Connector: Push the connector onto the new sensor until the clip clicks into place.
- Refill the Coolant (If Necessary): If any coolant leaked out during the replacement, you would need to replace it. Always use the type of coolant recommended by your vehicle’s manufacturer.
- Check for Leaks: Start the engine and let it reach operating temperature. Check around the sensor for any leaks. If there are no leaks, the replacement was successful.
Post-Replacement Steps
After replacing the sensor, you will need to reset the ECU so it can accurately read the new sensor’s signals. You can do this by either using an OBD-II scanner or disconnecting the battery for about 15 minutes.