Corrosion is the gradual destruction of metals, in this case, the metal components in your vehicle’s light sockets, due to chemical reactions, usually oxidation.
This stealthy destroyer, often appearing as an ugly brown or greenish deposit, can compromise the efficiency of your lights, reducing brightness or causing flickering. In severe cases, it might lead to complete light failure, posing safety risks during your travels.
Upon discovering corrosion in your car’s light sockets, you should:
- Turn off your vehicle and disconnect the battery
- Remove the bulb and examine the socket for signs of damage
- Clean the socket using a small wire brush or special cleaning tools, then apply a dielectric grease
- If the socket is extensively damaged, consider replacing it entirely
In the upcoming sections, we get into the nitty-gritty of identifying, preventing, and addressing light socket corrosion in your vehicle. We will provide you with detailed steps on how to clean and replace corroded light sockets.
Identifying Corrosion in Light Sockets
Recognizing corrosion in your vehicle’s light sockets early can save you from potentially dangerous driving situations and costly repairs. However, corrosion isn’t always visually obvious, especially in its early stages.
Common Signs of Light Socket Corrosion
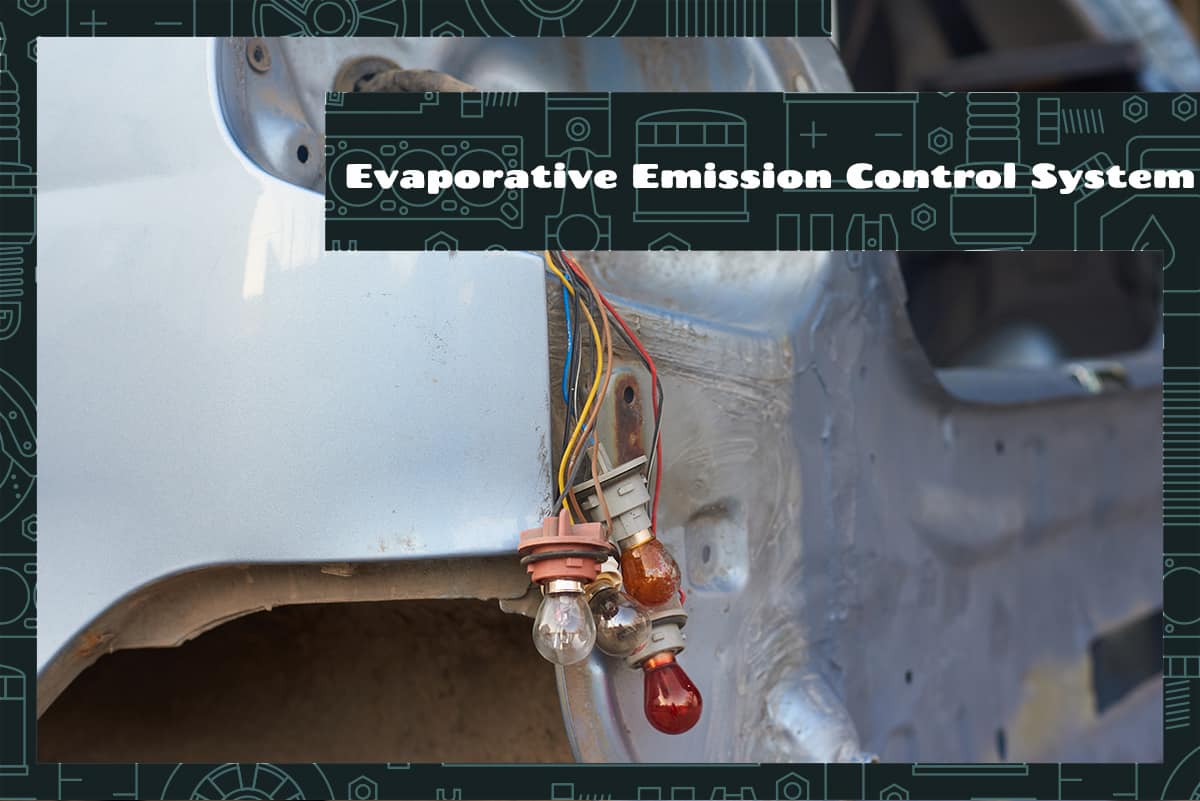
Corrosion typically begins as a powdery or crusty deposit, appearing in shades of white, green, or brown, depending on the metals involved and the environmental conditions.
These deposits are most commonly found around the metal contacts in the socket and on the bulb base. While physical inspection is the most straightforward way of identifying corrosion, you must also be alert to more subtle symptoms.
If you notice a decreased brightness in your headlights or taillights, or if they start flickering intermittently, these could be signs of a corroded socket disrupting the electrical flow. A corroded socket may also prevent your bulb from fitting securely, which can lead to loose or wobbly bulbs. In extreme cases, the light might fail altogether, signaling a severe corrosion problem.
Dangers and Risks of Ignoring Corroded Sockets
Ignoring a corroded light socket is not just an inconvenience; it’s a safety risk. Corrosion in the socket can lead to unstable connections, reducing the efficiency of your lights, making you less visible to other drivers, and hindering your own visibility in low light or adverse weather conditions.
A heavily corroded socket can cause an electrical short, potentially leading to a blown fuse, damage to other electrical systems, or in worst-case scenarios, an electrical fire. It can also result in premature bulb failure, leading to unexpected replacement costs and downtime.
Causes of Light Socket Corrosion
To tackle corrosion in light sockets effectively, it’s essential to understand the factors that lead to it. While the result of corrosion is relatively consistent, the causes can vary significantly.
Here, we’ll explore common triggers for light socket corrosion in vehicles.
1. Humidity and Moisture
It might seem strange, considering the interior nature of light sockets, but moisture can find its way into these components in several ways. Driving in wet weather conditions, exposure to high humidity, and even condensation from temperature fluctuations can introduce moisture into your light sockets.
When moisture meets the metal contacts within the socket, it can lead to oxidation—a chemical reaction resulting in corrosion. This corrosion inhibits the flow of electricity, thus impacting the performance of your vehicle’s lights. If your vehicle is often parked outdoors or frequently driven in wet conditions, it may be more susceptible to this form of corrosion.
2. Age and Wear
Time is an unavoidable factor in corrosion. As your vehicle ages, so do its components. Constant exposure to heat, vibrations, and electrical current can wear down the protective layers in your light sockets, making them more prone to corrosion.
Repeated bulb replacements can cause wear and tear to the socket’s metal contacts, further increasing the likelihood of corrosion.
3. Electrical Surges and Overloads
Electrical issues can also contribute to light socket corrosion. Over time, electrical surges can cause small amounts of damage to the metal contacts within the socket. While these effects might not be immediately noticeable, they can accelerate the corrosion process over time.
Step-By-Step Guide to Addressing Corroded Light Sockets

Once you’ve identified a corroded light socket in your vehicle, swift action can limit the damage and restore the performance of your lights. This section outlines a step-by-step process for dealing with corroded light sockets, from safety considerations to cleaning methods and replacement procedures.
Equipment and Precautions
First, ensure the vehicle is turned off, and the key is removed from the ignition. Disconnect the battery to prevent any electrical current from flowing through the vehicle during your repair.
Next, gather the necessary tools for the job. This typically includes a small wire brush or corrosion cleaning tool, a clean cloth or paper towels, and dielectric grease, such as Sanchem NO-OX-ID (Amazon). Always wear safety gloves to protect your hands and safety glasses to shield your eyes from any dislodged corrosion particles.
How to Clean a Light Socket
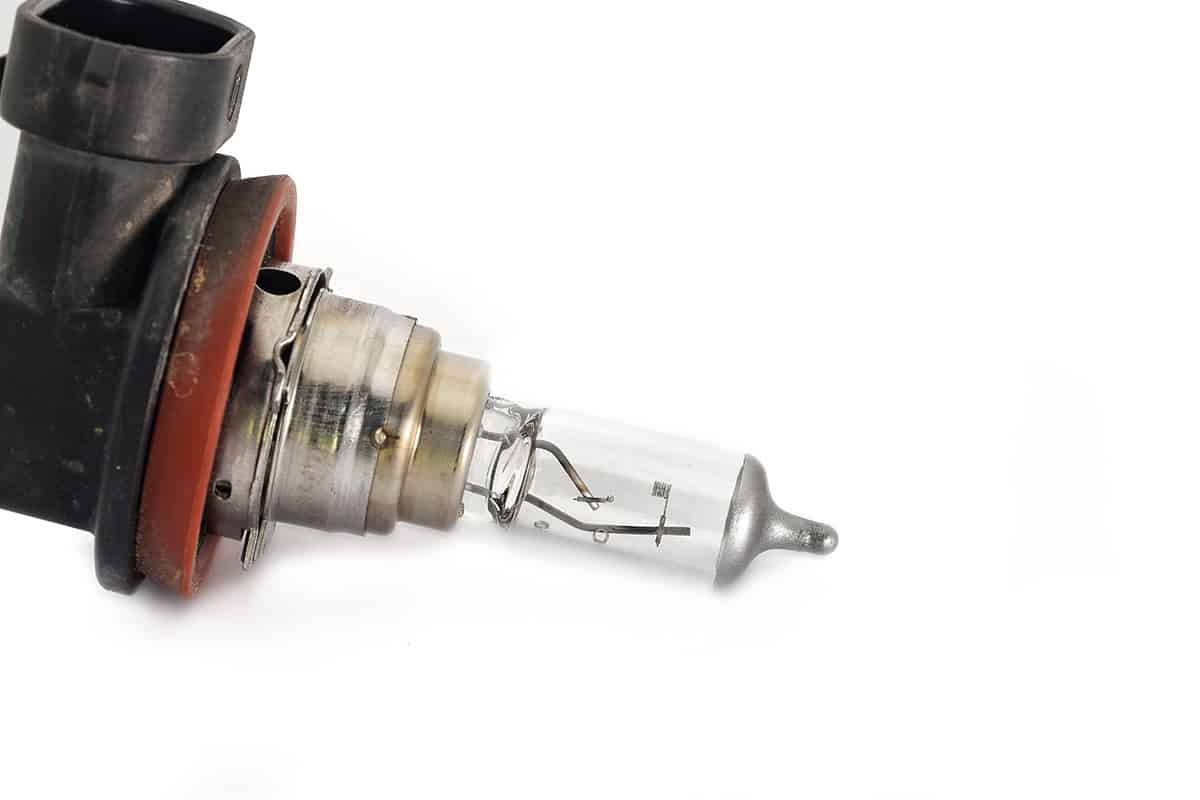
- Remove the Bulb: The first step in cleaning a corroded socket is removing the light bulb. Depending on your vehicle model, this may involve unscrewing the bulb or unclipping it. Refer to your vehicle’s manual for specific instructions.
- Inspect the Socket: With the bulb removed, inspect the socket carefully. Look for signs of corrosion, such as discoloration, rust, or powdery deposits.
- Clean the Socket: Use your wire brush or cleaning tool to gently remove the corrosion. Be sure to reach all areas, particularly the metal contacts. Brush away the loosened corrosion particles with a clean cloth or paper towel.
- Apply Dielectric Grease: Once the socket is clean, apply a small amount of dielectric grease. This grease not only displaces any remaining moisture but also forms a protective barrier against future corrosion.
- Reinstall the Bulb: Finally, reinstall the bulb, ensuring it fits securely in the cleaned and greased socket.
When to Replace a Corroded Socket
While cleaning can remedy minor to moderate corrosion, there comes a point when replacement is the best course of action. If the socket is severely corroded or damaged, or if cleaning doesn’t restore the light’s function, it’s time to replace the socket.
To replace a corroded light socket, you’ll need a new socket that matches your vehicle’s specifications, wire cutters, wire strippers, electrical tape, and wire connectors. The replacement process involves cutting the old socket off, stripping the insulation from the wires, connecting the new socket using the wire connectors, and securing everything with electrical tape.
Always refer to your vehicle’s manual or seek professional assistance to ensure a correct and safe replacement.
Preventing Future Corrosion
While treating existing corrosion is important, preventing it from happening in the first place is the key to prolonging the life of your vehicle’s light sockets.
Regular Inspections and Maintenance
By routinely checking your sockets for early signs of corrosion, such as discoloration or powdery deposits, you can address the problem before it becomes significant. Aim to inspect your light sockets every time you replace a bulb or at least twice a year.
Maintenance also plays a pivotal role in corrosion prevention. Applying dielectric grease to your light sockets during bulb changes can protect against moisture and oxidation, two leading causes of corrosion. This non-conductive grease forms a seal that keeps out moisture, thereby preventing corrosion.
Proper Bulb Replacement
How you handle and replace bulbs can also impact the risk of corrosion. Always use bulbs of the correct wattage for your vehicle to prevent overheating, which can wear down the protective layers in the socket and expose the metal to corrosion.
Using Corrosion-Resistant Light Sockets
If your vehicle suffers from frequent light socket corrosion, you might want to consider upgrading to corrosion-resistant light sockets. These sockets are designed with materials that resist oxidation, such as gold-plated contacts, and can offer a longer lifespan, especially in harsh environments.